


All Products
-
 BurookHi Norman... I just remembered i didn't let u know.... everything worked out we made both the wired and the remot control opening work... they loved the item (assuming it will hold its own for the next 10 years or so)
 -
 KiranYes I don’t doubt you. Jutai is one of the most confident companies I came across in China
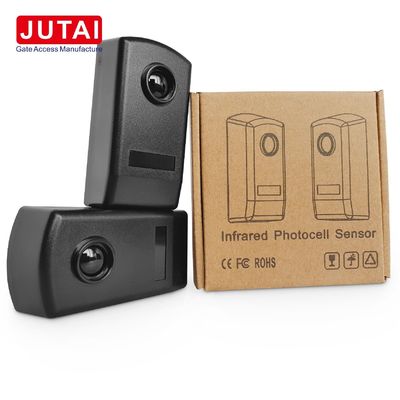
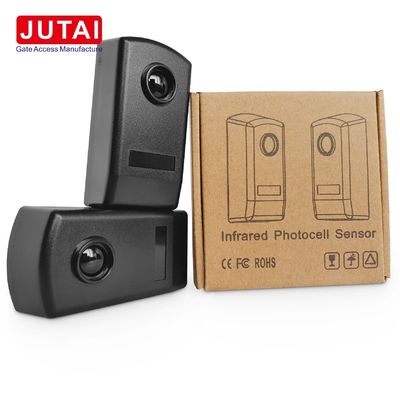
Outdoor Sunshine Resistance 30m Detection Range IP65 Waterproof Infrared Photocell Sensor for Gate Safety

Product Details
| IP Rating | IP65 | HS Code | 8531901000 |
|---|---|---|---|
| Package Size | 12.00cm * 11.70cm * 4.30cm | Package Gross Weight | 0.150kg |
| Detection Type | Photon Detector | Type | Wired |
| Highlight | sunshine resistance infrared photocell sensor,sunshine resistance photocell infrared sensor,gate safety infrared photocell sensor |
||
Product Description
Outdoor Sunshine Resistance 30m Infrared Photocell Sensor For Gate Safety
Outdoor Sunshine Resistance 30m Infrared Photocell Sensor for gate safety. JUTAI Automatic door sensor infrared photocell, when interrupting the infrared, the relay will output switch signal, it can work for parking barrier, walking gate, vehicle gate as body induction. It also can work as window, door, and passageway anti-burglar detection.

Technical Specifications
| Feature | Specification |
|---|---|
| Power Supply | 12-24VAC/VDC |
| Max. Range | 20 Meters |
| Operating Temperature | -10 to +60°C |
| Max. TX Working Current | 25mA |
| Max. RX Working Current | 35mA |
| Max. Relay Contact | 500mA at 48VAC/VDC |
| IP Rating | IP65 with rubber |
Key Features
- Single beam sensors, commonly used for automatic sliding doors, shutter doors, garage doors, windows, and other applications
- Each unit comprises a transmitter and receiver with integrated amplifier generating an infrared beam
- Narrow infrared beam helps prevent interference from external light sources
- Reliable detection range of 2-20 meters even when installed at low height (20-40cm from floor)
- IR-20 sensor features self-detecting function for sliding doors with automatic reversal safety
Operation & Application
Install each pair of detectors at opposite positions, creating an infrared area between them. When someone passes through this infrared region, the detector sends an alarm signal to the security alarm host.
Ideal for installation in security systems at schools, office buildings, hospitals, home yards, etc.
The detecting range remains stable even in adverse weather conditions such as rain, dust, etc.
An English Usage Manual is included in the pack, providing detailed instructions with diagrams for easy installation and setup.
Product Design
JUTAI IR-20 infrared Photo Sensor features a very small and compact size, IP65 waterproof level and super light resistance. Designed to be stable and reliable in outdoor environments with strong ultraviolet rays and harsh sand and dust conditions.
Connection Details
Installation Guide
To open the IR-20M, lift the front panel of the photocell. Insert the cables in their housing and fix the base to the wall.
For wall mounting: drill three 5mm holes and fit suitable screw anchors.
For metal mounting: drill three 3mm holes for fitting with self-tapping screws.
Make connections and power the photocells with 12-24V DC/AC. Proper alignment is indicated by the red LED being off on the receiver.
Cover the photocell with the front panel and test the system by interrupting the beam several times.
Quality Assurance
JUTAI IR-20 20 meters wired infrared photocell provides stable and reliable detection distance. Our infrared lamps use German brands to ensure distance stability and light resistance. Our relays use Japan's Omron brand to ensure compatibility with various door operator brands. SMT patch production ensures quality accuracy in batch manufacturing.
Product Range
After several years of development, we offer a comprehensive range of infrared products including 20 meters wired models, 30 meters wireless models, 7 meters reflected infrared sensors, and Curtain Photocell groups.
Recommended Products